
A Properly Installed Standing Seam Metal Roof Lasts 50 to 70 Years — But Should You Install One Yourself?
A DIY standing seam metal roof is one of the most rewarding — and demanding — home improvement projects a homeowner can take on. Done right, it delivers a roof that lasts 50 to 70 years, outperforms asphalt shingles in wind resistance, energy efficiency, and longevity, and can save you $7,000 to $10,000 in labor costs on a typical 1,500 sq ft home.
But it is not a weekend project.
Before you order panels or climb a ladder, here is a quick answer to whether DIY standing seam is right for you:
Is a DIY standing seam metal roof worth it?
| Factor | Quick Answer |
|---|---|
| Potential savings | $7,000 – $10,000 on a 1,500 sq ft roof |
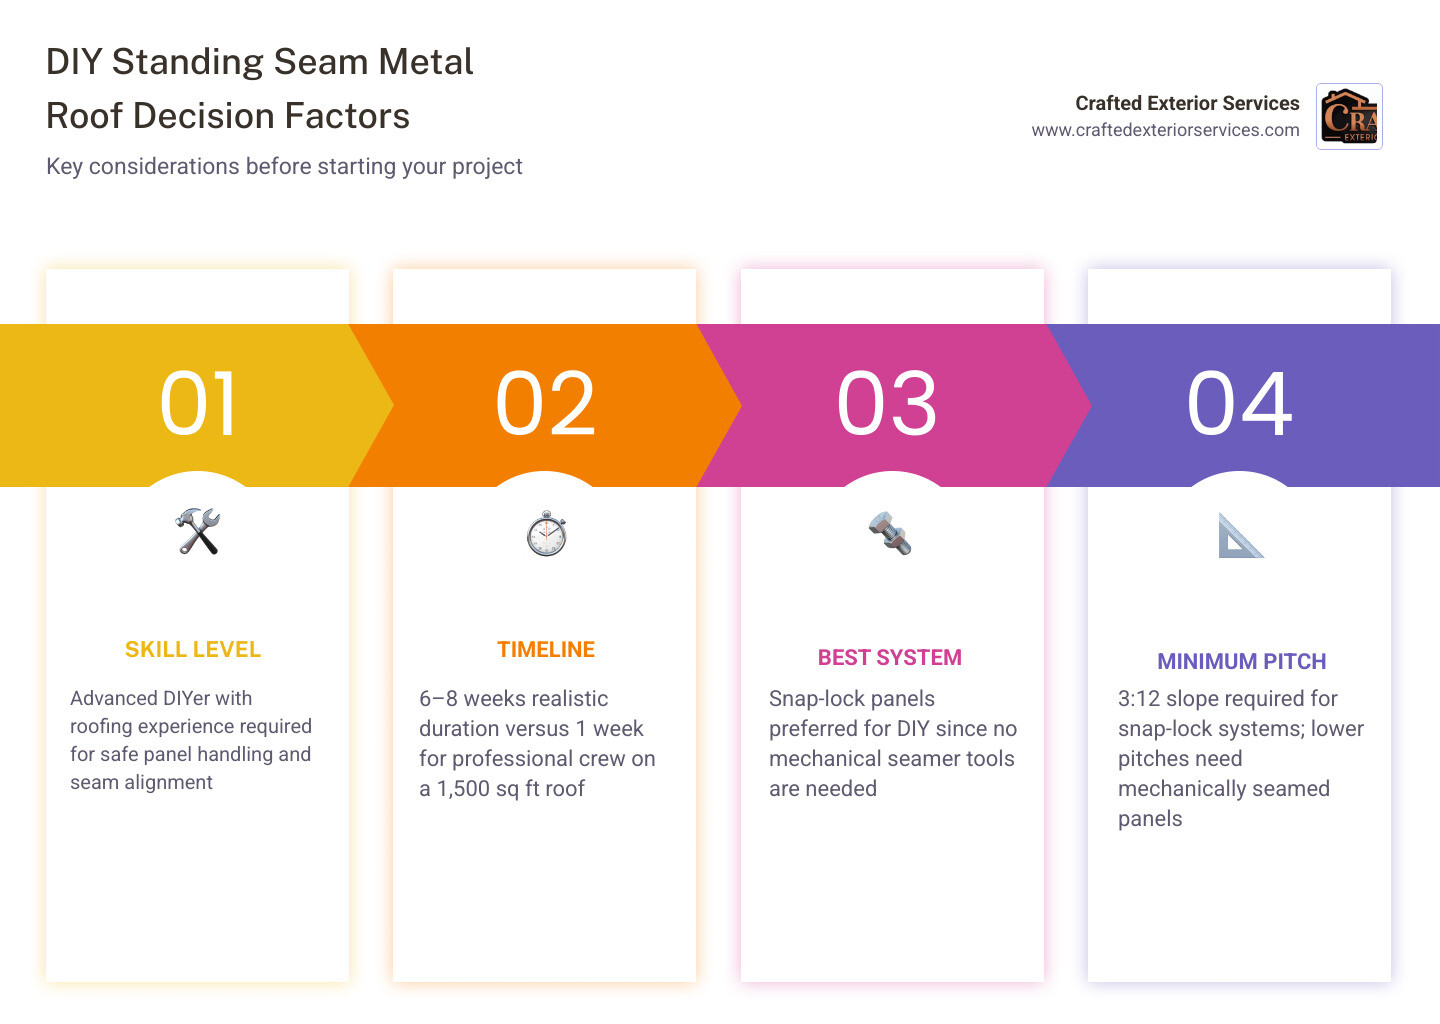
| Realistic timeline | 6–8 weeks (vs. ~1 week for a pro crew) |
| Skill level required | Advanced DIYer with roofing experience |
| Best panel system for DIY | Snap-lock (no mechanical seamer needed) |
| Minimum roof pitch | 3:12 for snap-lock systems |
| Biggest risk | No workmanship warranty, safety hazards |
| Best for | Simple gable roofs, not complex multi-valley designs |
If you are a homeowner in Martinsburg, WV dealing with an aging or storm-damaged roof, you have two paths: tackle it yourself or work with a trusted local roofing company who stands behind the work. This guide helps you figure out which path makes sense for your situation.
In May 2026, standing seam metal roofing is more accessible to DIYers than ever. Snap-lock panel systems have eliminated the need for expensive mechanical seaming equipment. Cool-roof pigments and solar-ready seam designs are now standard options from most suppliers. And direct-from-factory purchasing has pushed material costs down significantly.
Still, the gap between possible and practical is real. Many homeowners who start a DIY standing seam project discover mid-way through that the complexity, physical demands, and extended timeline are more than they bargained for — and finding a contractor willing to finish an incomplete DIY job is notoriously difficult. Comparing the full DIY route against professional roof replacement services is a smart first step before committing either way.
This guide walks you through everything: costs, tools, snap-lock vs. mechanical seam systems, step-by-step installation, and the warranty and code implications you need to know before you start.
Is a DIY Standing Seam Metal Roof Feasible?
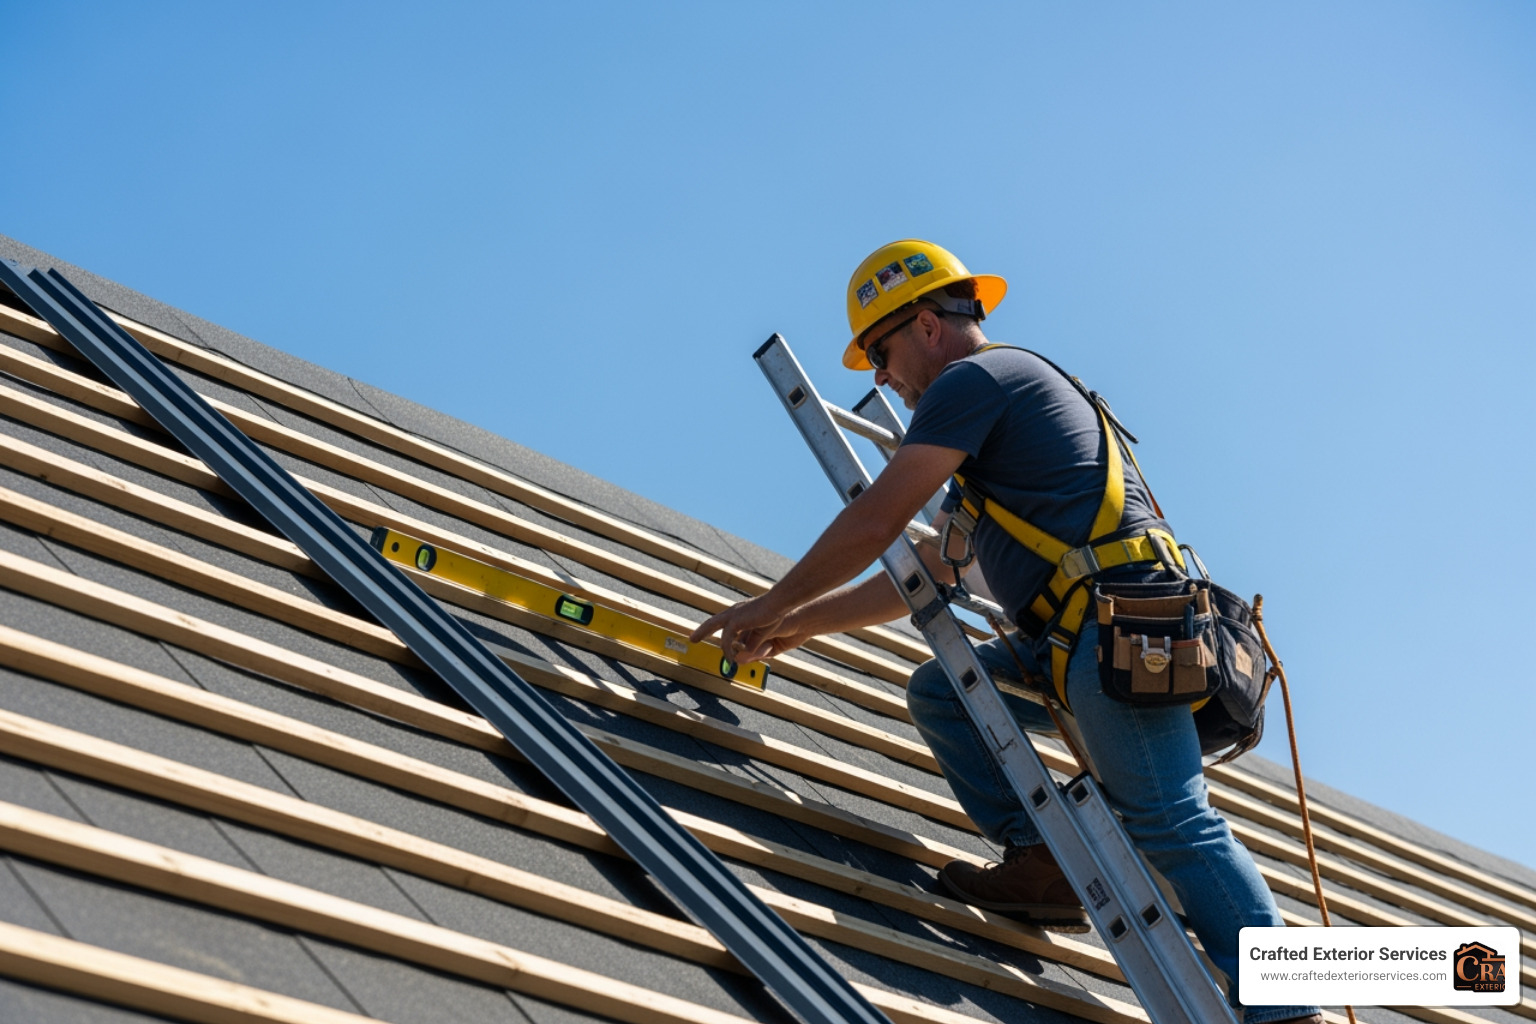
Yes, a DIY standing seam metal roof is feasible for advanced DIYers, but it requires specialized tools, a minimum of two people, and strict adherence to safety protocols. If you have never worked on a roof, handled heavy sheet metal, or operated specialized hand tools, starting with a standing seam metal roof is highly risky.
Physical Fitness and Skill Level
Installing a metal roof is incredibly demanding physical work. You will spend weeks walking on sloped surfaces, lifting 20-foot to 30-foot metal panels, and bending over to secure clips. Because metal panels act like sails in even a light breeze, you absolutely cannot do this job alone. You need at least one dedicated, physically fit helper to hand up panels, hold them in alignment, and assist with fastening.
Realistic Timelines
A professional roofing crew can tear off an old roof and install a new standing seam system on an average home in about one week. For a DIYer working weekends and evenings, a typical DIY standing seam metal roof installation takes about 2 months.
This extended timeline introduces a massive risk: keeping your home dry. You must plan your work in small sections and closely monitor local weather forecasts.
Critical Weather Windows in WV and MD
In our local service areas — including Martinsburg, WV, Bunker Hill, WV, and Hagerstown, MD — weather is a major factor. The ideal weather windows are late spring and early autumn. Trying to install a metal roof during the humid heatwaves of July or the freezing, icy winds of January is not only miserable, but it also increases safety hazards. Metal panels become incredibly slippery when wet with morning dew, rain, or frost, and they can reach scorching temperatures under the direct summer sun.
Before committing to this massive time investment, it is worth exploring how metal compares to other options. Read our deep dive on asphalt shingles vs metal roofs which is better to evaluate if a different material might better fit your budget and DIY comfort level.
The Pros and Cons of a DIY Standing Seam Metal Roof
To make an informed decision, you must weigh the substantial financial savings against the personal risks and challenges.
The Pros:
- Massive Cost Savings: Labor typically makes up 50% to 60% of a professional roofing quote. By doing the work yourself, you can keep thousands of dollars in your pocket.
- Pride of Workmanship: There is an undeniable satisfaction in looking up at a flawless, lifetime roof that you installed with your own hands.
- Complete Material Control: You choose the exact metal gauge, paint finish (such as premium Kynar 500), and underlayment brand.
The Cons:
- No Workmanship Warranty: If your DIY roof leaks two years from now, there is no contractor to call. You are entirely responsible for diagnosing and repairing the damage.
- Extreme Time Commitment: Giving up your weekends for two months can put a strain on your family and personal life.
- Safety Risks: Falls from roofs are a leading cause of serious construction injuries. Working with sharp metal sheets at heights is inherently dangerous.
- No “Plan B”: If you get overwhelmed and cannot finish, most local contractors will refuse to step in and complete a half-finished DIY project due to liability and warranty concerns.
As noted in the industry-standard guide Can You DIY a Standing Seam Metal Roof? What to Know BEFORE You Start (Part 1) – Sheffield Metals, understanding these hard truths upfront is the best way to avoid a mid-project disaster.
Assessing Roof Complexity and Pitch
The feasibility of your DIY project depends heavily on the architecture of your home.
Simple Gable Roof (Two flat slopes)   -->   Highly Feasible for DIY
Complex Roof (Valleys, dormers, chimneys) --> High Risk / Call a Pro
If your home has a simple gable roof with two flat slopes and no valleys, dormers, or chimneys, it is an excellent candidate for a DIY install. However, if your roof has multiple valleys, intersecting ridges, dormers, or skylights, the difficulty level skyrockets.
Pitch Requirements
Standing seam systems are highly versatile, but they have strict pitch limits. For a DIY-friendly snap-lock system, the industry standard minimum roof pitch is 3:12. If your roof is flatter than a 3:12 pitch, you must use a mechanically seamed system, which requires specialized power seaming tools and advanced training.
Skip Sheathing vs. Solid Decking
Most modern residential standing seam roofs are installed over solid plywood or OSB decking covered with a high-performance synthetic underlayment. However, if you are working on an older home in West Virginia or Maryland, you might encounter historic skip sheathing (wooden boards spaced apart).
Installing metal directly over skip sheathing can lead to severe condensation issues as warm, humid air from the attic hits the cold metal panels. To prevent this, you must either install solid sheathing over the skip boards or use a specialized slip-sheet underlayment system to manage moisture. To see examples of various roof profiles and how they are prepped, explore our dedicated page on standing seam metal roofing.
Financial Breakdown: DIY Standing Seam Metal Roof Costs
A primary motivator for any DIY project is saving money. But how much do you actually save when you factor in tools, waste, and delivery? Let’s look at the real numbers for a typical 1,500 sq ft roof (15 squares of roofing).
Original Cost Comparison: DIY vs. Professional (1,500 Sq Ft Roof)
| Cost Category | DIY Estimate (Snap-Lock) | Professional Estimate |
|---|---|---|
| Metal Panels (24-Gauge Steel) | $6,000 – $9,000 | Included in contract |
| Underlayment (High-Temp Synthetic) | $800 – $1,200 | Included in contract |
| Clips, Fasteners, and Sealants | $600 – $1,000 | Included in contract |
| Trim and Flashing (Drip, Ridge, Rake) | $1,200 – $1,800 | Included in contract |
| Specialized Tools & Safety Gear | $800 – $1,500 | N/A |
| Permits & Local Inspections | $150 – $300 | Included in contract |
| Delivery / Freight Fees | $300 – $600 | Included in contract |
| Labor Costs | $0 (Sweat Equity) | $7,000 – $12,000 |
| Total Project Cost | $9,850 – $15,400 | $18,000 – $27,000 |
On average, a homeowner can expect to spend around $8,000 to $12,000 on DIY materials and tools, compared to a professional contractor quote of $18,000 to $25,000 for the same home. For a real-world look at how quickly these small material and tool costs can add up, check out Standing Seam DIY: How Much Can You Really Save? (Part 2).
Hidden and Unexpected DIY Costs
When budgeting for a diy standing seam metal roof, many homeowners forget to calculate the “hidden” expenses that do not show up on a basic material calculator:
- The DIY Waste Factor: While professional crews can work with a 5% waste factor, DIYers should budget for 10% to 15% waste to account for miscuts, bent panels, and practice pieces.
- Freight and Delivery: Standing seam panels are shipped in long, heavy crates. Residential delivery often requires a specialized flatbed truck with a forklift, adding hundreds of dollars to your shipping bill.
- Underlayment Upgrades: You cannot use standard organic felt paper under a metal roof. Metal panels can reach temperatures of 160°F or higher, which will melt traditional asphalt felt. You must invest in premium, high-temperature self-adhering synthetic underlayment.
To explore standard metal panel options, gauges, and paint finishes that fit your budget, visit our metal roofing materials overview.
Snap-Lock vs. Mechanical Seam Systems
Choosing the right panel profile is the single most important decision you will make for your DIY installation. Standing seam systems generally fall into two categories: snap-lock and mechanically seamed.
| Feature | Snap-Lock System | Mechanical Seam System |
|---|---|---|
| Installation Difficulty | Moderate (Excellent for DIY) | High (Requires professional training) |
| Special Tools Needed | Basic hand tools | Power seamer ($3,000+ to buy or rent) |
| Minimum Roof Slope | 3:12 pitch | 0.5:12 pitch |
| Wind & Weather Resistance | Excellent | Superior (Best for extreme climates) |
| Thermal Movement | Excellent (Via sliding clips) | Moderate |
| Labor Time Per Square | 5 – 8 Hours | 8 – 12 Hours |
Snap-lock systems are the optimal choice for DIY installations because they do not require expensive mechanical seaming tools and accommodate thermal expansion naturally.
Snap-Lock: [Panel 1] <--- Click! ---> [Panel 2]  (No special tools)
Mechanical: [Panel 1] <--- Crimped ---> [Panel 2]  (Requires power seamer)
Thermal Expansion and Floating Clips
Metal expands and contracts significantly as temperatures change. A 30-foot steel panel can easily expand by 1/4 inch between a cold winter night and a hot summer day. If you pin the panel down tightly with exposed screws, it will buckle, warp, and create a loud popping noise known as “oil canning.”
Snap-lock systems solve this by using floating clips (concealed metal brackets) that hold the panel rib down to the deck while allowing the metal to slide freely up and down as it expands.
To learn more about the engineering standards behind these metal panel designs and how they perform under extreme wind loads, you can consult the Metal Construction Association.
Essential Tools and Safety Equipment
Do not attempt to start this project with a standard household toolbox. Working with standing seam panels requires specialized sheet metal tools.
The DIY Tool Checklist
- Torque-Controlled Screw Gun: Essential for driving fasteners to the exact depth without stripping the wood deck or over-tightening the clips.
- Aviation Snips (Left, Right, and Straight): For making precise cuts around valleys, hips, and penetrations.
- Hand Seamers (Drip Edge Folders): For bending the bottom edges of the panels over the eave drip edge.
- Woku Roller Bender: A specialized tool used to fold clean, consistent hems on the ends of your metal panels.
- Chalk Line (Non-Staining): To keep your panels perfectly square. Never use red chalk, as it can permanently stain painted metal finishes.
Safety Gear is Non-Negotiable
Roofing is dangerous, and metal roofing is even more so. You must strictly follow OSHA Fall Protection Guidelines to protect yourself and your helpers.
- Full-Body Safety Harness: Wear a properly fitted harness connected to a secure anchor point on the roof ridge.
- High-Traction Roofing Shoes: Invest in shoes with specialized soft rubber soles designed to grip metal surfaces.
- Heavy-Duty Cut-Resistant Gloves: Raw sheet metal edges are razor-sharp. You will need high-quality work gloves to avoid severe cuts.
If looking at this tool list and safety setup makes you feel uneasy, it is a clear sign that a full DIY install might be too risky. In many cases, handling minor repairs yourself is highly feasible, while leaving the main roof to a professional crew is the safer bet. Explore our roof repair services to see how we can help keep your home safe without you having to climb a ladder.
Step-by-Step Installation Process
Before laying your first panel, you must understand the golden rule of panel layout: Always square your roof deck using the 3-4-5 triangle method before laying your first panel to prevent crooked runs and oil canning. If your first panel is out of square by even 1/8 of an inch, that error will multiply across the roof, leaving your final panels completely crooked.
For a detailed look at how a real homeowner planned, prepped, and executed their layout (including the mistakes they made along the way), watch DIY Standing Seam Metal Roof: A Homeowner’s Real Experience (Mistakes, Tools & What Worked) – Sheffield Metals.
Preparing for Your DIY Standing Seam Metal Roof
- Secure Permits: Visit your local building department in Martinsburg, WV or Hagerstown, MD to pull the required residential roofing permits.
- Tear Off and Inspect: Remove all old asphalt shingles down to the bare wood deck. Inspect the plywood for rot or water damage and replace any soft spots.
- Install Underlayment: Roll out your high-temperature synthetic underlayment, overlapping the edges by at least 4 inches.
- Install Eave Trim: Secure your drip edge along the eaves. If you are using gutters, make sure the drip edge channels water directly into them.
Laying Panels and Securing Seams
- Establish a Square Guide Line: Use the 3-4-5 method to snap a perfectly square chalk line from the ridge to the eave.
- Hem the First Panel: Use your hand bender to fold a 1-inch hem on the bottom edge of your first panel. Slip this hem over the eave drip edge.
- Fasten the Clips: Place concealed clips along the male leg of the panel, spacing them according to the manufacturer’s specifications (usually 12 to 24 inches apart), and screw them into the deck.
- Snap the Next Panel: Place the female leg of the second panel over the male leg of the first panel. Press down firmly — or use a rubber mallet — until you hear the satisfying “click” of the snap-lock joint.
- Install Trim & Ridge Cap: Once all panels are secured, install your rake trim on the gable ends, run transition flashing around any walls or chimneys, and finish the peak of the roof with a vented ridge cap.
Warranty, Codes, and Long-Term Maintenance
Before you buy materials, you must understand how a DIY installation affects your long-term protection.
Manufacturer Warranties
Most premium metal roofing manufacturers offer robust material warranties (often 40 to 50 years on the paint finish). However, many manufacturers will void the warranty if the panels are not installed by a certified professional. Read the fine print of your material supplier’s contract. If they require professional installation for the warranty to remain valid, a DIY install could leave you with zero financial protection if the paint peels or the metal rusts prematurely.
Building Code Compliance
Local building codes in West Virginia and Maryland are strict about wind uplift ratings and ice dam protection. You must ensure your panel spacing, clip frequency, and underlayment choices meet or exceed local residential building codes. That a local building inspector will need to sign off on your work before the permit can be closed.
Long-Term Maintenance
While metal is incredibly durable, it is not completely maintenance-free. To keep your roof performing beautifully for decades, follow the care guidelines from the Metal Roofing Alliance:
- Annual Inspections: Twice a year, walk the ground around your home and inspect the roof with binoculars. Look for any loose trim or backing-out fasteners.
- Keep It Clear: Clear away accumulated leaves, pine needles, and branches from valleys and gutters to prevent moisture traps.
- Check Sealants: Inspect the neoprene boots around plumbing pipes and the silicone sealant around chimney flashings every 5 years, replacing them as they dry out and crack.
Frequently Asked Questions about DIY Standing Seam Metal Roofs
Can one person install a standing seam metal roof alone?
No, at least two people are required to safely handle, align, and secure long metal panels without bending or damaging them. Trying to manage a 20-foot metal panel by yourself in even a slight breeze is incredibly dangerous and will almost certainly result in bent, ruined metal.
What is the minimum roof pitch for a snap-lock standing seam roof?
The industry standard minimum pitch for snap-lock standing seam is 3:12. If your roof has a lower slope (flatter than 3:12), water can back up under the snap-lock joints during heavy rain or snowmelt, leading to leaks. For lower pitches, you must use a mechanically seamed panel system.
How do you prevent oil canning on DIY metal panels?
Prevent oil canning (the unsightly waviness or buckling that can appear in the flat areas of metal panels) by using a thicker gauge metal (such as 24-gauge instead of 26-gauge), ordering panels with built-in striations or rib profiles to break up flat surfaces, and avoiding over-tightening the installation clips to allow for natural thermal expansion.
Conclusion
Taking on a diy standing seam metal roof is an admirable goal that can save you thousands of dollars and leave you with a beautiful, lifetime roof. But it is a massive personal investment of time, physical labor, and meticulous attention to detail.
If you have a simple gable roof, a strong helper, the right tools, and two months of free weekends, you can achieve a fantastic result. But if your roof is complex, your schedule is tight, or the thought of working with sharp metal on a sloped surface makes you nervous, hiring professionals is the smartest decision you can make.
At Crafted Exterior Services, we are your premier local roofing experts based right here in Martinsburg, WV. We are a non-franchise, locally owned team offering manufacturer-approved products, full insurance coverage, and zero-down financing options to make your dream roof highly affordable.
Why risk your weekends and your safety? Let us handle the heavy lifting and provide you with a lifetime roof backed by an ironclad professional warranty.
Explore our premium standing seam metal roofing options today to schedule a free, no-pressure professional consultation and estimate.