
Pass Your Asphalt Shingle Roof Deck Inspection Before Shingles Go On
A successful asphalt shingle roof deck inspection starts after tear-off and before underlayment is installed. Check that the deck is dry, solid, properly supported, and securely fastened. Replace soft, rotten, cracked, delaminated, or badly sagging sheathing before covering it.
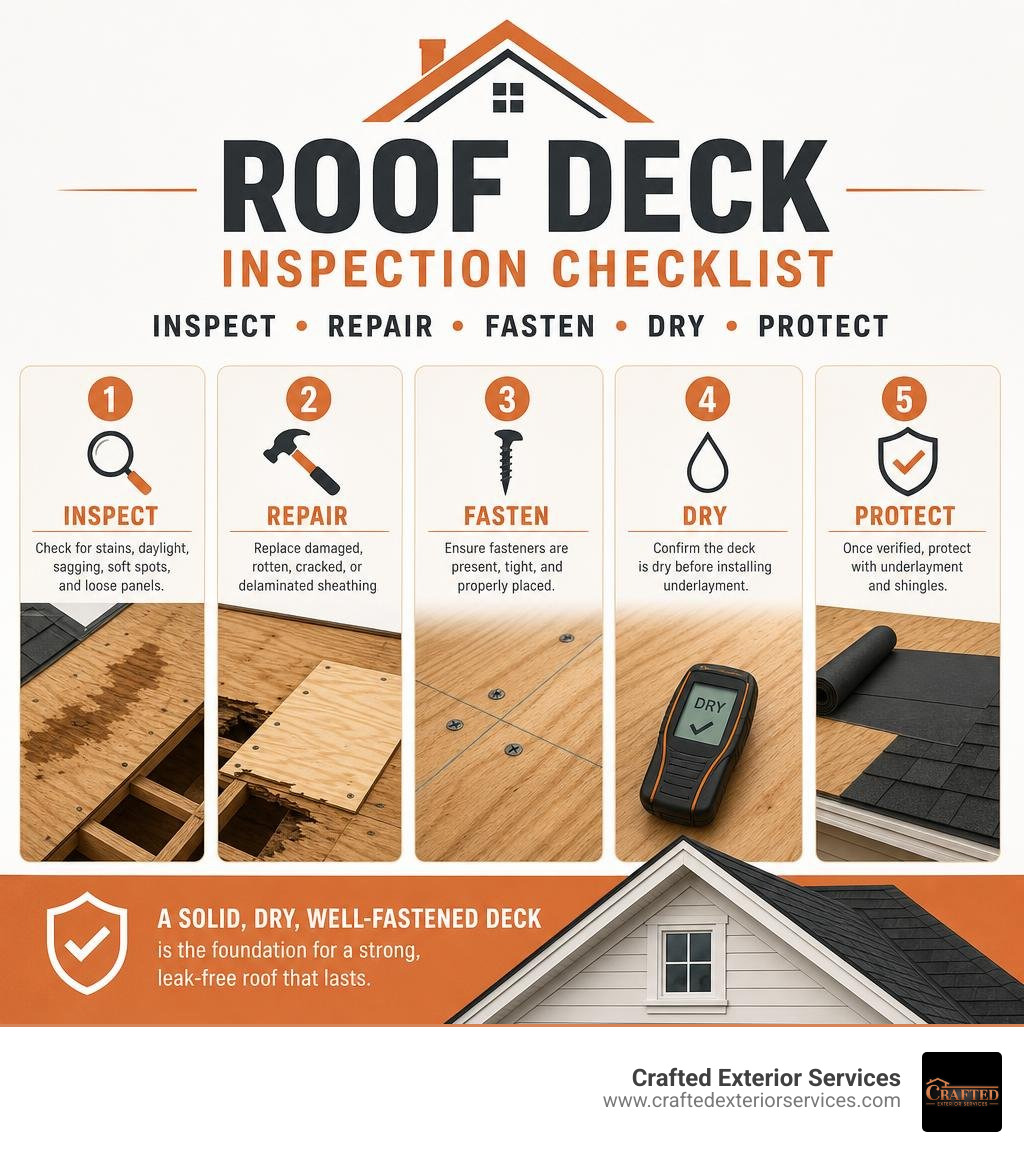
Use this quick pass-or-repair checklist:
- Inspect the attic side and roof surface for stains, daylight, sagging, soft spots, and loose panels.
- Confirm plywood, OSB, or plank decking has adequate thickness for the framing span and has proper support at panel edges.
- Check for 1/8-inch expansion gaps between panels and correct panel orientation.
- Verify fasteners are not missing, rusted, overdriven, or pulled through the sheathing.
- Repair water damage and confirm the deck is dry before installing ice barrier, underlayment, and shingles.
The roof deck is more than a surface for nails. It provides structural support, helps resist wind loads, and gives shingles a flat, stable base. A weak or wet deck can lead to nail pull-through, shingle buckling, leaks, and expensive repairs long before the shingles should wear out.
For homeowners facing storm damage or an aging roof, a thorough inspection is the best way to define repairs before hidden deck problems are sealed beneath a new roof. Crafted Exterior Services helps homeowners understand the condition beneath their shingles and prepare for a durable replacement.
I’m Wes Pence, and this guide will walk you through the roof-deck checks that protect your home, your inspection result, and your new shingles.
Relevant articles related to asphalt shingle roof deck inspection:
Critical Substrate and Sheathing Requirements for Roof Decks
A solid roof deck requires structural panels that match framing spans, proper edge bearing, and correct expansion spacing to support asphalt shingles under wind, rain, and snow loads. When we evaluate decks for residential roofing systems in Martinsburg, WV, and Hagerstown, MD, we verify the underlying deck panels against precise structural criteria before any underlayment touches the wood.
| Substrate Type | Minimum Thickness (Standard 24″ Rafter Span) | Fastener Requirement | Thermal/Moisture Expansion Spacing | Key Inspection Focus |
|---|---|---|---|---|
| Oriented Strand Board (OSB) | 7/16 inch (APA Rated Sheathing) | 8d common nails (2-1/2″) or ring-shank nails | 1/8-inch gap at panel ends and edges | Screened/textured side facing up; swollen edges from moisture exposure |
| CDX Plywood | 3/8 inch (minimum), 1/2 inch (recommended) | 8d common nails (2-1/2″) | 1/8-inch gap at panel ends and edges | Delamination of veneer plies; face grain oriented perpendicular to rafters |
| Solid Wood Planks | 1 inch nominal (3/4 inch actual net) | Minimum 2 nails per joist/rafter bearing | Maximum 1/4-inch space between boards | Board width capped at 6 inches to prevent cupping and shingle buckling |
Sheathing Thickness, Panel Orientation, and Expansion Spacing
Roof panel sheathing must meet specific thickness minimums and orientation standards to prevent surface sagging and structural failure under load. In modern construction with rafters or trusses spaced 24 inches on center, 7/16-inch OSB or 1/2-inch exterior-grade plywood is the baseline standard.
According to professional Inspecting Roof Panel Sheathing guidelines, wood panels must be installed with their long dimensions and face grain running perpendicular to the roof rafters or trusses. This orientation maximizes the panel’s bending strength across multiple structural supports.

A mandatory requirement that municipal inspectors check is the 1/8-inch expansion gap between adjoining panel ends and edges. Wood structural panels expand as seasonal humidity rises. Without this 1/8-inch buffer, expanding OSB and plywood press tightly against one another, buckle upward at the seams, and create visible ridges across the finished shingles. Every panel joint must also rest squarely over framing centers with at least 1/2 inch of solid bearing surface.
Evaluating Plywood, OSB, and Solid Wood Plank Decks
Different deck materials present distinct mechanical behaviors during an inspection. Plywood offers excellent cross-laminated strength and high nail-holding power, but prolonged water leaks can cause the internal adhesive plies to separate (delaminate). OSB provides uniform shear strength and eliminates natural core voids, but its edges are vulnerable to swelling if exposed to standing water, creating permanent ridges that telegraph through asphalt shingles.
Solid wood plank decking—common in historic homes across West Virginia and Maryland—requires specialized checks. As detailed in the InterNACHI Asphalt Shingle Substrate Guide, solid deck boards must not exceed 6 inches in nominal width. Boards wider than 6 inches continuously cup, twist, and shrink as ambient humidity fluctuates, stressing the asphalt shingles above and causing premature tears.
Furthermore, natural resin pockets in older pine and fir boards chemically react with asphalt when heated, accelerating shingle decay if not isolated by a continuous protective underlayment. If board gaps exceed 1/4 inch, we recommend overlaying the entire surface with a minimum of 3/8-inch exterior-grade plywood before proceeding.
How to Perform an Asphalt Shingle Roof Deck Inspection
Performing an effective roof deck evaluation requires a structured assessment from both the exterior roof surface and inside the attic cavity. Before anyone sets foot on a roof, safety protocols must be established. Under OSHA standard 29 CFR 1926.501(a)(2), contractors are legally required to verify the structural integrity of walking and working surfaces before permitting crew access.
For detailed pre-inspection criteria, contractors utilize the Roof Deck Integrity Assessment Tool to evaluate framing members, load-bearing thresholds, and fall hazards. When we conduct specialized assessments through our roof inspection services in Chambersburg PA, we integrate hands-on physical testing with advanced diagnostic equipment to identify concealed defects.
Essential Tools for an Asphalt Shingle Roof Deck Inspection
Accurate deck diagnostics require professional-grade inspection instruments:
- Pinless & Pin-Type Moisture Meters: Pinless meters rapidly scan broad decking areas for elevated moisture percentages without puncturing panels, while pin-type meters confirm deep moisture saturation in timber framing (readings above 18-20% indicate rot risks).
- Infrared Thermal Imaging Cameras: Thermal devices detect thermal bridging and hidden moisture trapped within sheathing and attic insulation by highlighting temperature differentials.
- Awl or Structural Pick Tool: A simple awl allows inspectors to perform the standard “pick test” on discolored framing to distinguish between superficial cosmetic water staining and active fungal wood decay.
- Digital Calipers: Calipers verify exact net sheathing thickness against APA stamp specifications and building code tables.
- High-Resolution Inspection Cameras: Comprehensive photo and video documentation with verified date/time stamps provides essential evidence for building officials, real estate disclosures, and insurance adjusters.
Visual and Structural Integrity Assessment from the Attic and Exterior
A comprehensive deck inspection combines an exterior surface check with an attic crawl. On the outside, an inspector walks the roof planes to detect bounce, localized deflection, or spongy resistance underfoot.
Inside the attic, the inspector checks the underside of the sheathing for dark moisture stains, white salt efflorescence, rusted fastener shanks, and mold blooms. Discoloration around roof valleys, plumbing vents, and chimneys signals chronic leaks.
The inspector also checks for daylight penetration through the deck, verifies that rafter spacing matches engineering spans (typically 16 or 24 inches on center), and evaluates attic ventilation balance. Poorly balanced intake and exhaust ventilation traps hot, moist air against the roof deck, softening sheathing panels and causing shingle blistering from beneath.
Fastener Verification, Nailing Schedules, and Structural Framing Support
A roof deck is only as reliable as the fasteners anchoring it to the building frame. Standard building code mandates 8d common nails (2-1/2 inches long by 0.131-inch shank diameter) driven flush with the panel face. Fasteners must never be overdriven, as recessed nail heads crush structural wood fibers and reduce lateral shear strength.
Inspectors check that fasteners along panel edges are spaced no more than 6 inches apart, with a minimum 3/8-inch edge distance to prevent edge breakout. Fasteners along intermediate framing supports (the panel field) must be spaced no more than 12 inches apart. When learning how to nail your next Hagerstown asphalt shingle roof installation, contractors must recognize that smooth staples are prohibited for structural deck attachment; ring-shank nails or full-gauge common wire nails provide the necessary pull-out resistance.
Where panel edges meet between rafters without solid blocking, H-clips (panel edge clips) provide horizontal alignment and support, preventing individual panel edges from deflecting under concentrated loads.
Identifying Common Roof Deck Defects and Water Damage
Undetected wood rot and structural deck failures compromise asphalt shingle attachments, leading to fastener blow-through and active water intrusion during wind-driven storms. If leaks are caught early, timely roof leak repair can resolve localized moisture before decay spreads across multiple sheathing panels.

Detecting Rot, Delamination, Sagging, and Deck Bounce
Structural degradation takes several forms depending on the deck material:
- Fungal Wood Rot: Caused by persistent moisture exposure exceeding 20% wood moisture content. An awl pick test reveals sound wood breaking in long, fibrous splinters with audible resistance, whereas decayed wood snaps cleanly across the grain without resistance.
- Plywood Delamination: Continuous leaks weaken exterior adhesives, causing panel veneers to separate and buckle, eliminating the nail-holding grip required for shingle fasteners.
- Deck Bounce and Soft Spots: Spongy deflection between rafters indicates that the sheathing has lost its flexural rigidity or that unbacked horizontal panel joints have failed.
- Framing Deflection and Sagging: Pronounced dips in the roof plane suggest compromised rafters, undersized framing lumber, or trusses subjected to excessive snow or dead loads.
How Old Roofing Layers and Improper Substrate Repairs Impact Shingle Longevity
Failing to strip old roofing layers down to bare wood prevents inspectors from discovering hidden deck rot and compromises the new shingle installation. Installing new asphalt shingles over existing layers (a roof-over) adds excess dead weight to the framing and prevents shingles from nesting flat against the deck plane.
When you schedule complete roof replacement services, tearing the assembly down to bare wood is essential to confirm that every substrate panel meets structural specifications.
Common improper substrate repairs that shorten shingle life include:
- Unsealed Fastener Penetrations: Leaving hundreds of empty nail holes from previous tear-offs without verifying deck integrity allows condensation to bypass the underlayment.
- Patching with Non-Structural Material: Using thin plywood, scrap lumber, or mismatched board thicknesses creates uneven ridges and weak points across the roof deck.
- Omitting Expansion Gaps: Forcing replacement panels tightly against existing decking causes edge crowning when seasonal humidity rises.
- Voiding Manufacturer Warranties: Leading shingle manufacturers, including GAF, Owens Corning, and CertainTeed, require clean, flat, and structurally sound decks; installing over compromised decking voids limited wind and material warranties.
If your home has weathered severe hail or wind, our team at Crafted Exterior Services provides thorough storm damage roof repair and full restoration to ensure hidden deck damage is resolved before new shingles are applied.
Building Code and Regional Standards for Passing Inspection
Passing a municipal or third-party roof deck inspection requires strict compliance with International Residential Code (IRC) standards and local building amendments across the Eastern Panhandle of West Virginia and Western Maryland.
How to Pass an Asphalt Shingle Roof Deck Inspection in High-Wind and Freeze Zones
In high-wind zones (basic design wind speeds exceeding 130 mph), building codes enforce tighter nailing schedules. Fastener spacing along intermediate framing supports drops from 12 inches to 6 inches on center within 48 inches of roof edges, ridges, and eaves. Along gable end framing, panel edge nails must be placed every 4 inches on center. Inspectors verify these schedules before underlayment can be applied.
In freeze-thaw climates subject to winter snow, ice accumulation, and seasonal freeze cycles, deck panels must support dead and live snow loads without exceeding code deflection limits (typically L/240 for roof rafters). Decks with improper spans or rotted framing will fail mid-installation inspections.
Underlayment, Ice Barriers, and Drip Edge Integration Requirements
Building codes require specific sequencing between the inspected wood deck, flashing components, and protective membranes:
- Self-Adhering Ice Barriers: In regions subject to ice damming, IRC Section R905.1.2 mandates a self-adhering polymer-modified bitumen membrane extending from the lowest eave edge to a point at least 24 inches inside the exterior wall line. This prevents backed-up meltwater from rotting the eave deck panels.
- Underlayment Fastening: Synthetic underlayments must be mechanically attached with corrosion-resistant plastic cap nails or metal cap nails rather than standard staples to resist wind uplift before shingle installation.
- Drip Edge Sequencing: At the eave edge (bottom), underlayment must lap over the top of the metal drip edge flashing to direct water run-off directly into gutters. Along the rake edge (sloped sides), the drip edge is installed over the underlayment to seal the edges against wind-driven rain penetration.
For general home maintenance guidance, explore our expert tips for extending the life of your home’s roof to protect your investment over the long term.
Frequently Asked Questions About Roof Deck Inspections
What is the minimum roof decking thickness required for asphalt shingles?
Under IRC standards and manufacturer specifications from GAF, Owens Corning, and CertainTeed, the minimum thickness for roof sheathing is 7/16-inch for OSB panels and 3/8-inch for exterior-grade plywood on rafters spaced up to 24 inches on center (though 1/2-inch plywood is strongly recommended for 24-inch spans). For solid wood boards, the minimum nominal thickness is 1 inch (3/4-inch net) with a maximum width of 6 inches.
Can you install new asphalt shingles directly over rotted or gapped decking?
No. Building codes and shingle manufacturer guidelines prohibit installing asphalt shingles over rotted, delaminated, or excessively gapped sheathing. If wood plank gaps exceed 1/4 inch, the deck must be overlaid with a minimum of 3/8-inch exterior plywood or OSB. Nails driven into rotted or decayed wood lack pull-out resistance, leading to blown-off shingles during moderate winds.
What causes an in-progress roof deck inspection to fail?
In-progress municipal roof deck inspections fail most commonly due to:
- Missing or overdriven fasteners along panel edges and intermediate supports.
- Failure to use approved fastener types (such as using staples or smooth nails instead of 8d common or ring-shank nails).
- Installing damaged, delaminated, or moisture-swollen OSB/plywood sheets.
- Omitting the required 1/8-inch expansion gap between panel seams.
- Inadequate bearing support where sheathing panel ends meet over rafters.
Conclusion
A thorough roof deck inspection provides the structural foundation for your entire roofing system. By confirming sheathing thickness, verifying proper 8d fastener patterns, ensuring 1/8-inch expansion gaps, and replacing rotted or delaminated wood panels before installing underlayment, you ensure your new shingles deliver their full rated service life.
At Crafted Exterior Services, our locally owned, non-franchise team provides complete roofing solutions across Martinsburg WV, Bunker Hill WV, and Hagerstown MD. We use manufacturer-approved materials, provide zero-down financing options, and maintain full insurance coverage to protect your home. Whether you need a detailed structural inspection, minor decking repairs, or a complete asphalt shingle roofing replacement, our team is ready to help.
Schedule your consultation online through Crafted Exterior Services to ensure your roof deck is built solid from the substrate up.