
Stop a Roof Drain Leak Before It Spreads
Most roof drain leaks can be stopped without replacing the whole roof. Start by removing leaves and silt from the strainer, then inspect the metal flange, clamping ring, bolts, and membrane around the drain. If the pipe is sound, roof drain repair usually means cleaning the area, installing a membrane-compatible patch, restoring the mechanical seal, and testing water flow.
For a persistent leak, damaged membrane, or ponding water, a flat-roof specialist can pinpoint the failure and make a targeted repair. Crafted Exterior Services helps homeowners protect their roof before a small drain issue turns into wet insulation, ceiling damage, or costly structural repairs.
Water that remains on a flat roof for more than 48 hours signals a drainage problem. And it adds up fast: each gallon weighs about 8.3 pounds. The good news is that leaks commonly start at the membrane-to-flange connection, which can often be repaired locally when the surrounding roof is still in good condition.
I’m Wes Pence, and the next five steps explain how to repair the drain seal safely and verify that water is moving where it should.
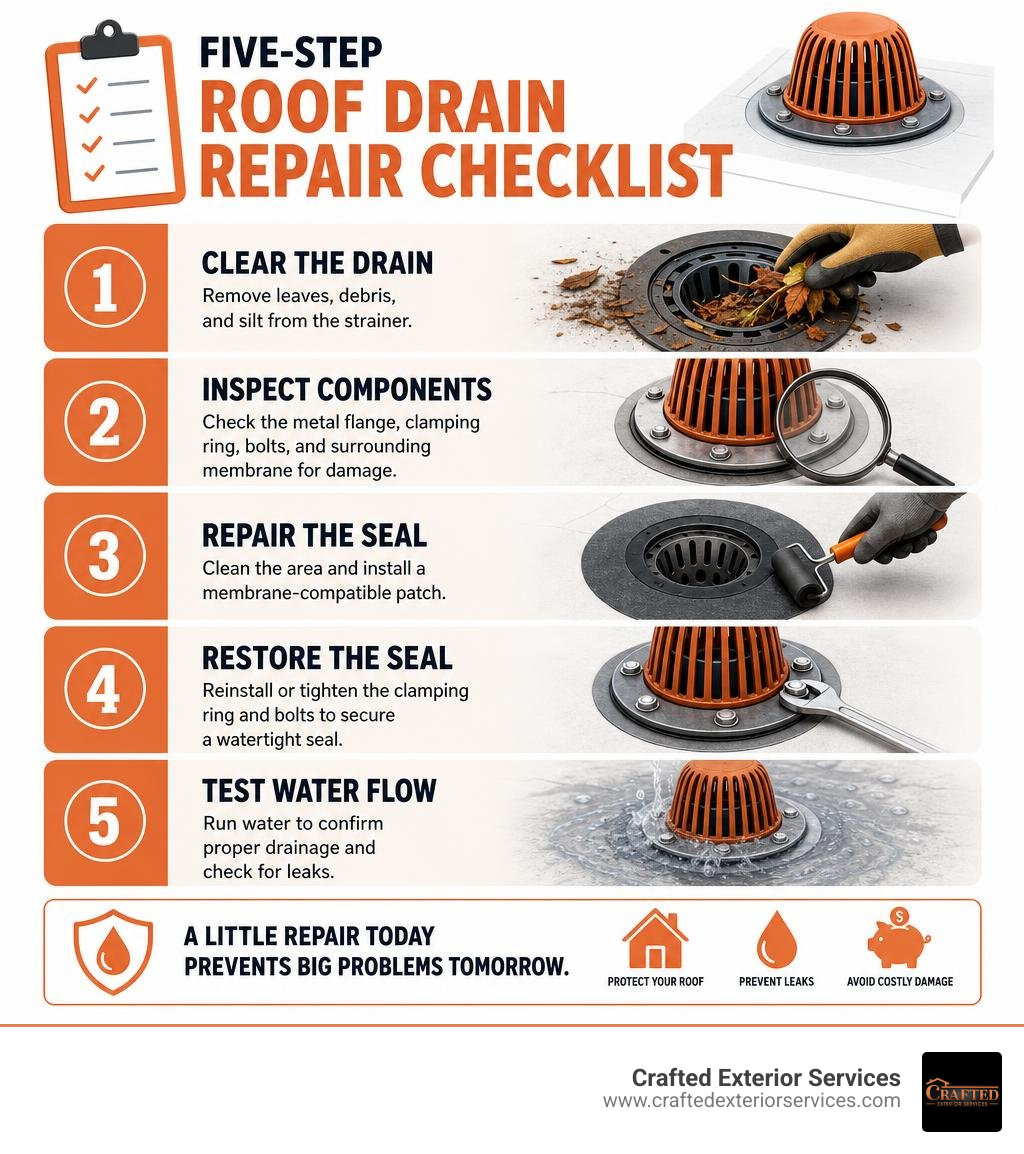
Simple guide to roof drain repair terms:
Identifying Common Causes and Signs of Drain Leaking
A leaking roof drain is caused by failed mechanical clamping rings, degraded sealants at the membrane interface, physical cracks in the drain bowl, or clogs causing heavy water accumulation. When standing water remains on a flat roof surface for more than 48 hours after precipitation stops, the roof drainage system has failed to clear runoff efficiently.
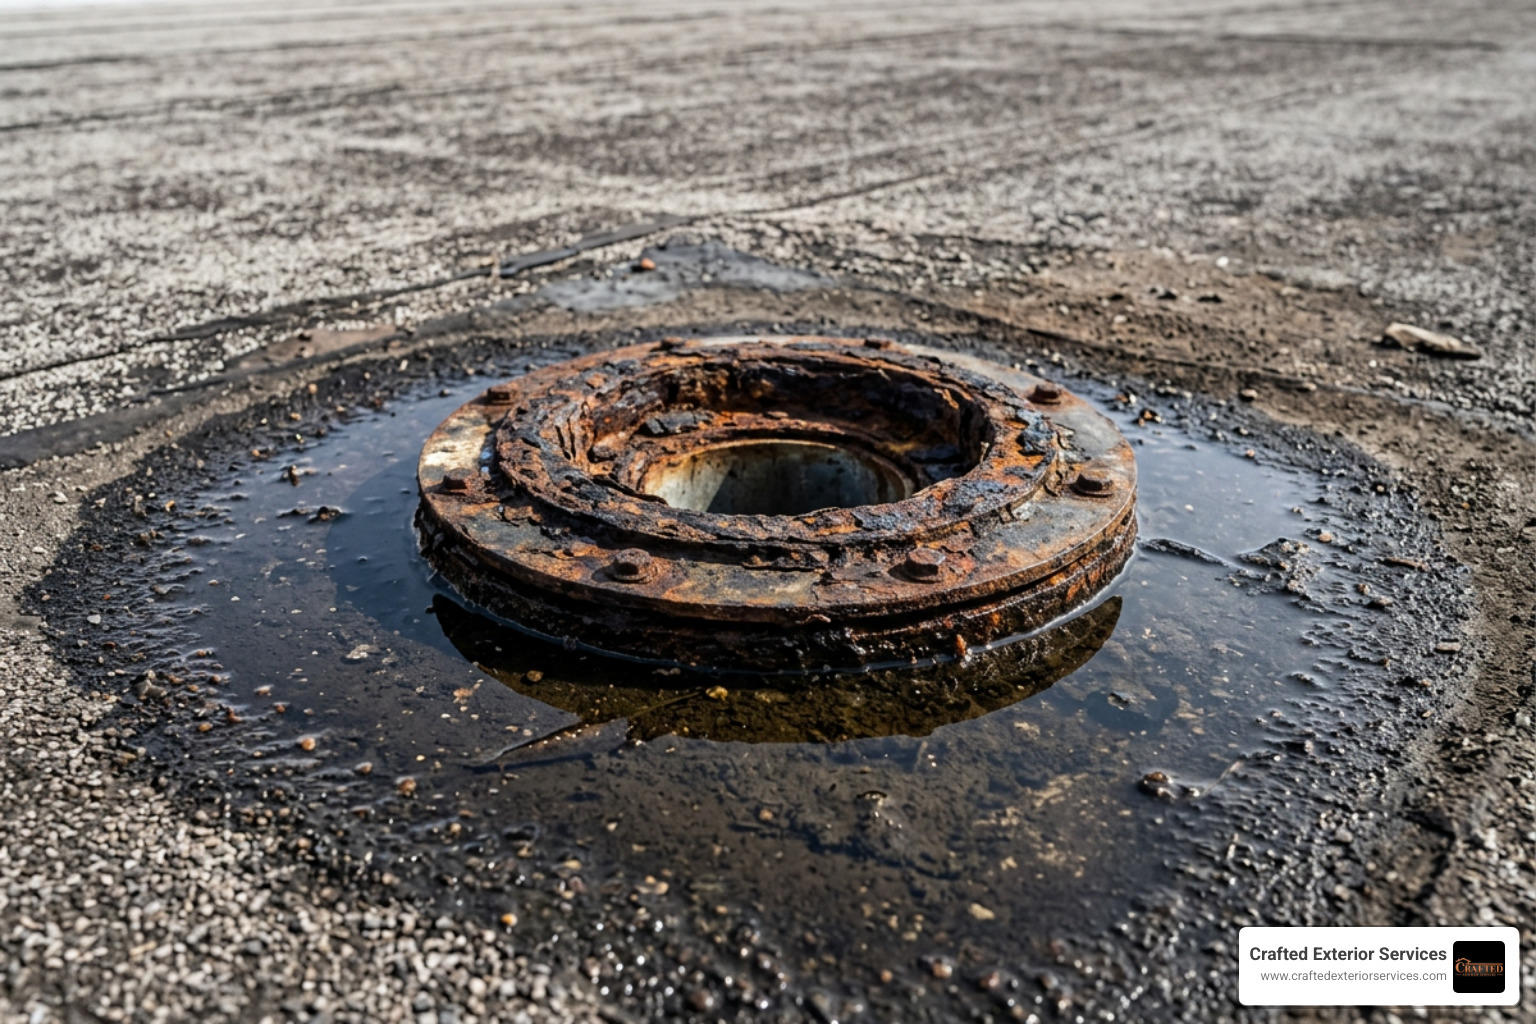
Water weight creates intense hydraulic load on low-slope systems. Because a single gallon of water weighs approximately 8.3 pounds, a clogged internal drain or blocked parapet scupper can collect thousands of pounds of dead weight across a low-slope roof deck. This concentrated load stresses roof rafters, cracks interior drywall, and forces standing water through microscopic breaches in the membrane.
Trapped moisture damages underlying building assemblies. When runoff breaches the drain flashing, sub-membrane moisture saturates the polyisocyanurate or expanded polystyrene insulation boards. Water-saturated insulation loses its thermal R-value immediately upon contact, creating significant thermal bridging that inflates monthly interior cooling and heating costs.
Identifying the exact point of entry requires distinguishing between plumbing cracks and roofing membrane failures. Conducting an isolated water test—running a hose directly into the drain bowl opening first, and then moving the water outward across the membrane flashing—pinpoints whether the plumbing stack or the roofing collar is leaking. Reviewing 10 signs your roof needs immediate attention helps spot warning indicators like rusted clamping bolts, deteriorated lead seals, and ceiling stains along structural columns before water undermines the underlying deck.
Understanding Membrane and Flange Interface Failures
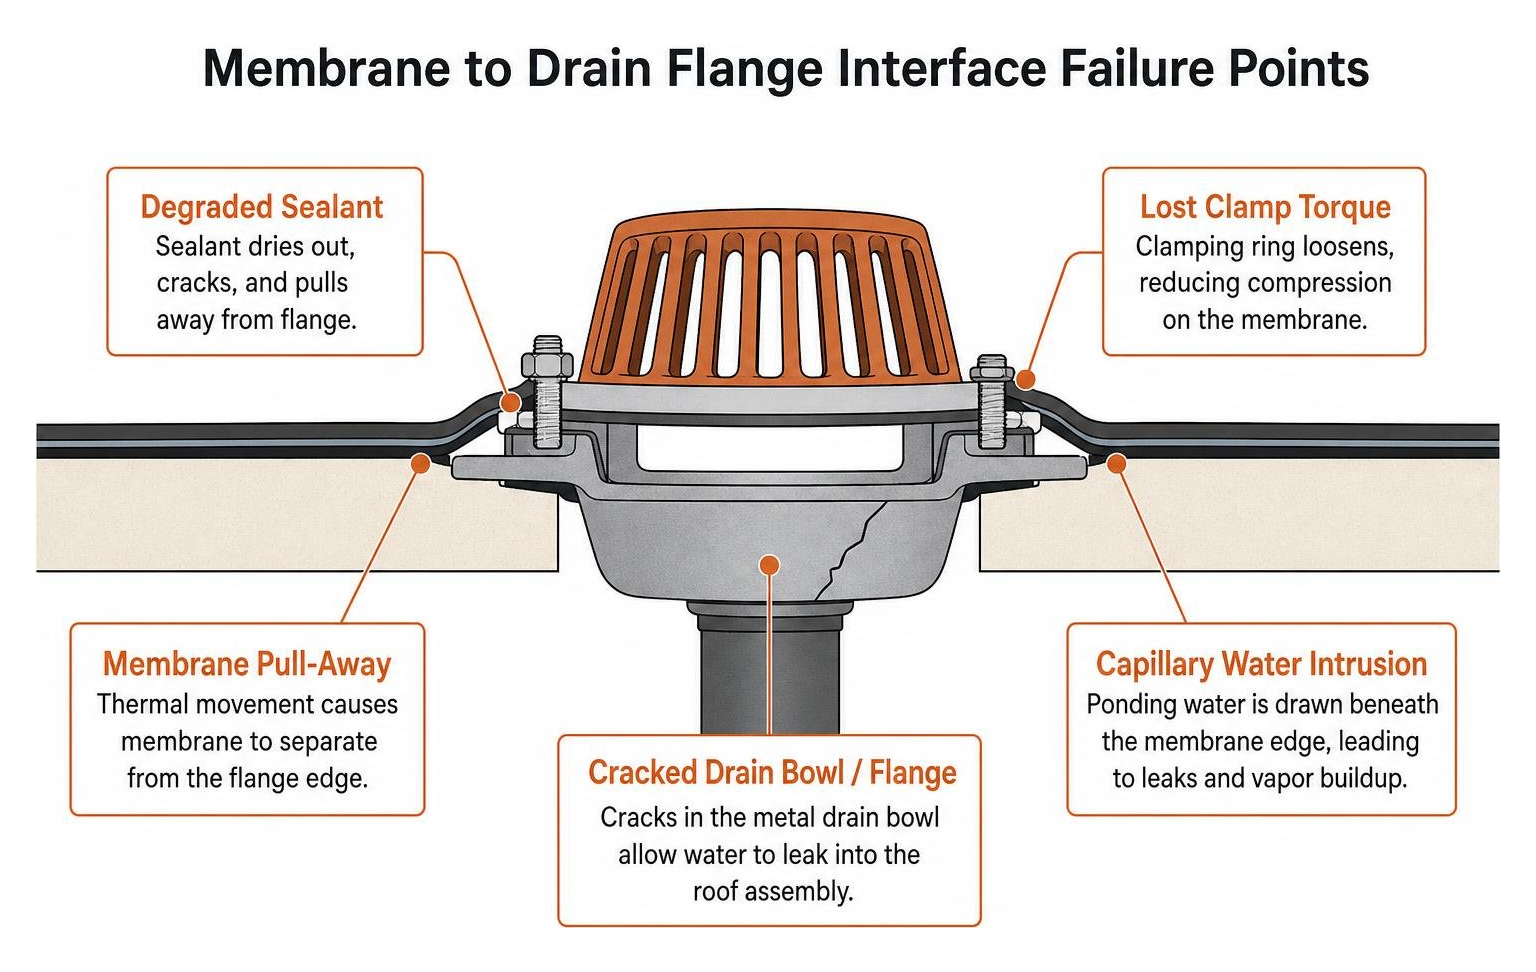
Most low-slope roof drain leaks occur directly at the junction between the single-ply membrane and the cast iron or copper drain flange rather than within the interior vertical drain pipe.
Metal and commercial single-ply membranes expand and contract at completely different rates during daily weather shifts. Mid-Atlantic diurnal temperature swings stress rigid sealants applied across the drain collar. Over time, traditional asphalt mastic dries out, cracks, and pulls away from the metal flange.
When the clamping ring loses its mechanical compression torque, capillary action draws ponding water beneath the edge of the membrane. This trapped water vaporizes under summer sun exposure, causing prominent membrane blisters and localized delamination around the drain sump. Knowing what to do when your roof starts leaking in a storm prevents emergency structural saturation while you plan a permanent mechanical repair.
The 5-Step Process for Flat Roof Drain Repair
The most reliable way to execute a flat roof drain repair is to mechanically re-flash the drain bowl using a single-ply membrane patch, premium lap sealant, and uniform clamping ring torque. Restoring the mechanical junction between the roof membrane and the metal drain bowl creates a permanent barrier against hydrostatic head pressure.
If you notice active water intrusion inside your living area or commercial space, executing targeted roof leak repair protects structural decking and preserves building assets.
Step 1: Disassemble the Strainer Dome and Clean the Substrate
Start by clearing all standing water from the drainage basin using a manual pump or wet-dry vacuum. Loosen the retaining bolts holding the strainer dome to the drain assembly and remove the cast iron or polyethylene dome. Unthread the clamping ring bolts completely and lift the clamping ring away from the drain bowl.
Scrape away all degraded asphalt mastic, aged butyl tape, and loose roofing cement from the metal flange using a stiff putty knife. Scrub the exposed cast iron or copper flange with a wire brush to eliminate rust scale and oxidation. Finish surface preparation by wiping down the flange and surrounding roof membrane with a solvent-dampened rag, ensuring the entire bonding zone is bone-dry and free of grease, silt, and residue.
Step 2: Prepare and Prime the Surrounding Membrane
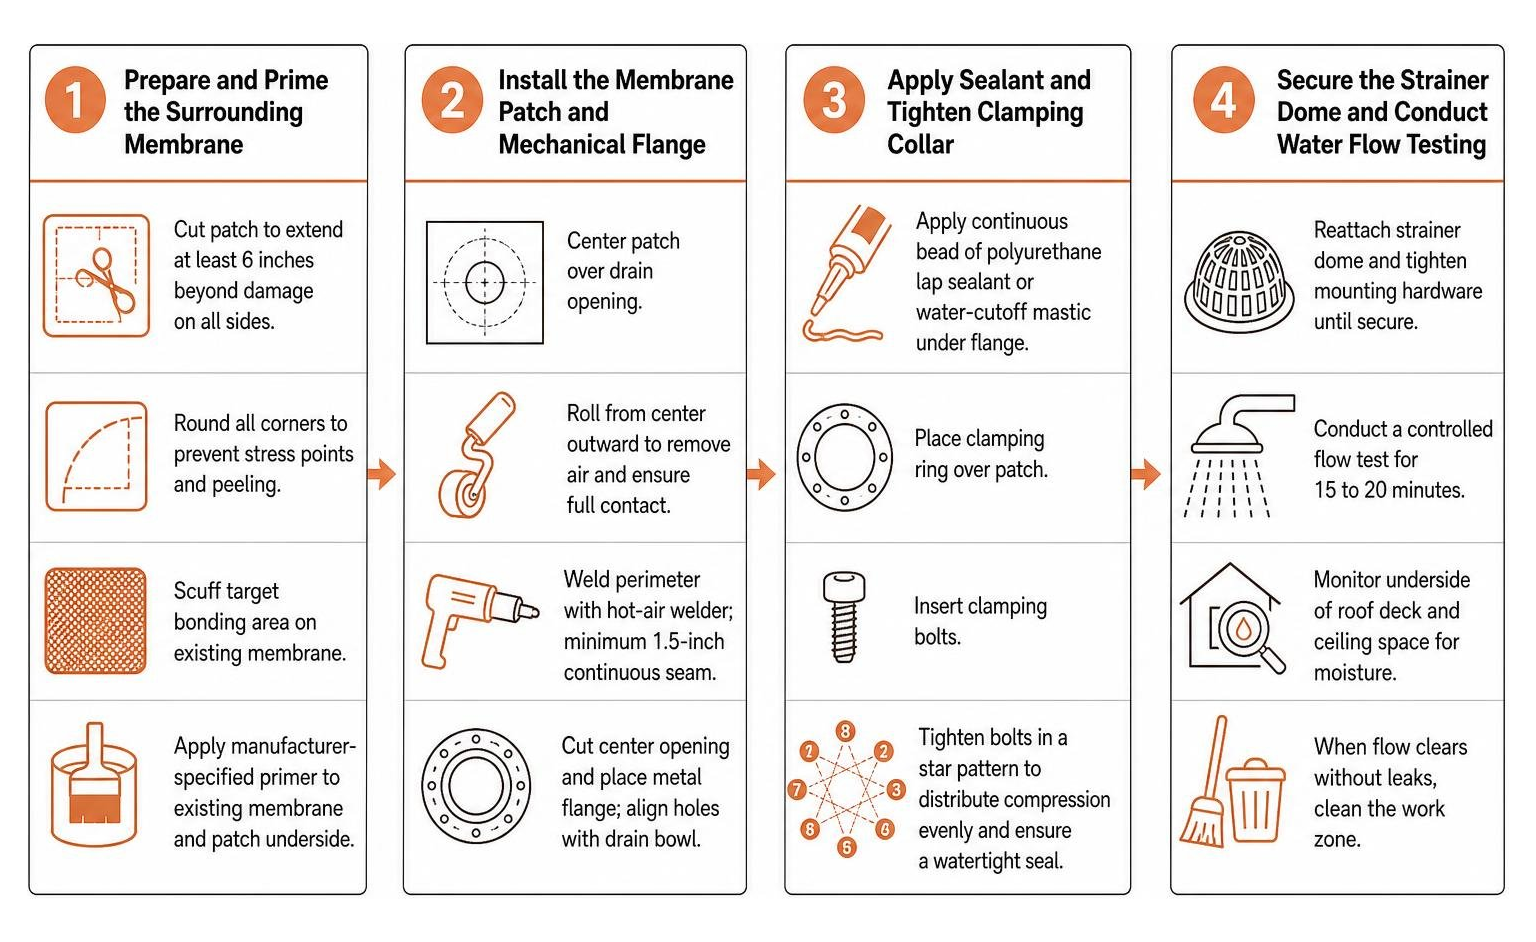
Cut a single-ply target patch from membrane material matching your existing roof system (such as EPDM, TPO, or PVC). Sizing is critical: the replacement patch must extend at least 6 inches beyond the damaged area in all directions to establish adequate seam strength.
Round every corner of the replacement patch using heavy-duty shears. Square 90-degree corners create stress points that peel during freeze-thaw cycles and seasonal thermal movements.
Scuff the target bonding area on the existing roof with an abrasive pad. Apply the manufacturer-specified single-ply primer (such as high-tack EPDM or TPO primer) across both the existing field membrane and the underside of the patch to reactivate oxidized polymers and promote complete chemical bonding.
Step 3: Install the Membrane Patch and Mechanical Flange
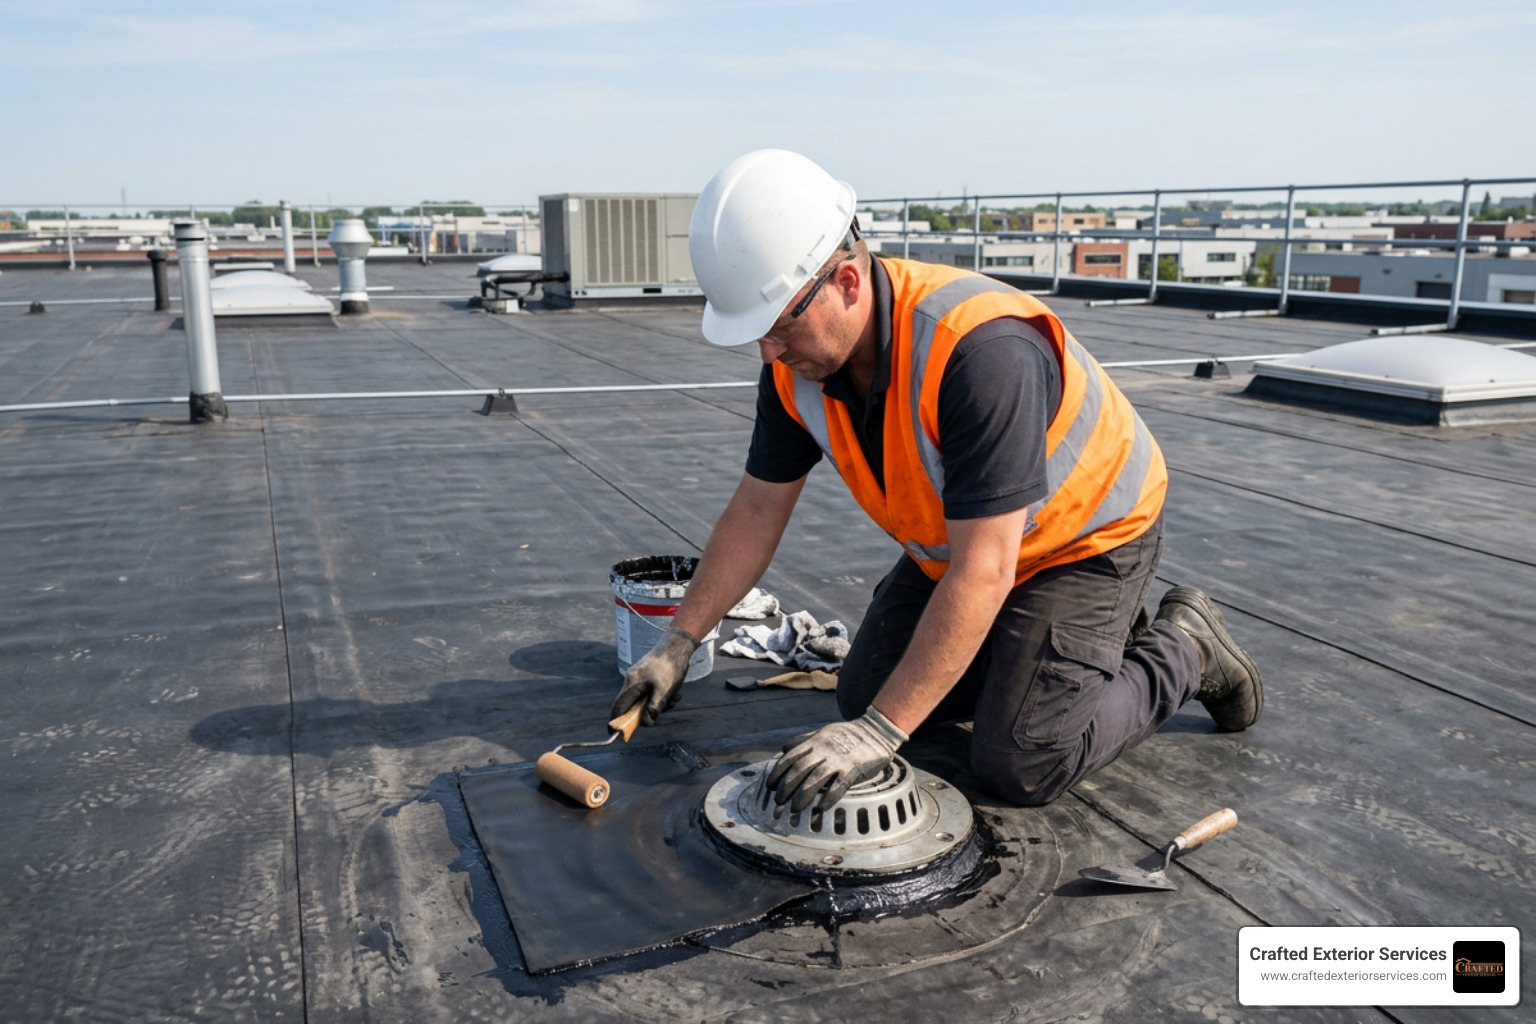
Center the prepared target patch directly over the drain opening. Using a seam roller, apply firm, even pressure from the center outward toward the perimeter edges to drive out trapped air pockets and achieve continuous contact.
For thermoplastic membranes (TPO or PVC), weld the perimeter of the patch to the existing field sheet using a handheld hot-air welder, maintaining a minimum 1.5-inch continuous weld seam around the entire circumference.
Carefully cut a round opening in the center of the patch matching the internal diameter of the drain bowl. Position the rigid metal drain flange over the opening, ensuring the fastener holes align cleanly with the threaded receiver slots on the drain bowl below.
Step 4: Apply High-Performance Sealants and Tighten Clamping Collar
Apply a heavy, continuous bead of elastomeric polyurethane lap sealant or water-cutoff mastic between the underside of the roofing membrane and the clean metal drain flange. Do not rely on standard silicone or acrylic caulking, as these materials lack the elongation and chemical resistance required for submerged low-slope drain sumps.
Position the mechanical clamping ring over the membrane patch. Insert the clamping bolts and tighten them progressively using a star pattern—similar to tightening the lug nuts on an automotive wheel.
This alternating tightening sequence distributes gasket compression evenly without pinching the membrane or cracking the ring assembly. Commercial systems like the high-wind-rated CYCLONE drain follow strict torque and calibration guidelines to maintain a watertight mechanical seal under severe hydraulic head pressure.
Step 5: Secure the Strainer Dome and Conduct Water Flow Testing
Reattach the strainer dome to the clamping ring assembly, tightening the mounting hardware until the dome is firmly seated. A durable dome prevents leaves, tree branches, and airborne trash from entering the plumbing stack.
Verify the integrity of the repair by conducting a controlled flow test. Direct a steady stream of water onto the repaired area for 15 to 20 minutes while monitoring the underside of the roof deck and the surrounding ceiling space for moisture migration. Once the flow clears cleanly without backflow or seepage, remove all discarded materials and clean the work zone.
Repair Sleeves, Retrofit Inserts, and Material Selection
When internal plumbing lines are inaccessible from inside the building or drain bowls suffer severe corrosion, insert assemblies and repair sleeves provide non-destructive alternatives to tearing out the ceiling.
| Repair Method | Best Application | Primary Advantage | Material Lifespan |
|---|---|---|---|
| Flange Membrane Re-Flash | Deteriorated sealant or torn membrane at drain collar | Restores factory mechanical seal without plumbing changes | 15–20 Years |
| Retrofit Drain Insert | Severely corroded cast iron bowls or inaccessible piping | Drops inside existing pipe with expanding watertight seal | 20–30 Years |
| Roof Drain Repair Sleeve | Surface membrane tears and minor collar corrosion | Fast, non-invasive installation with wide overlap | 10–15 Years |
| CIPP Trenchless Lining | Cracked vertical drain stacks inside walls/columns | Fully restores structural pipe without opening walls | 30–50 Years |
Retrofit inserts, such as the 2″ Copper-Tite retrofit roof drain, feature factory-installed expandable foam tape seals impregnated with asphalt. When inserted into an existing vertical pipe, the tape expands up to four times its compressed thickness to block water backflow.
For complex commercial pipe failures encased inside structural concrete or hazardous columns, trenchless cured-in-place pipe (CIPP) lining restores internal drainage capacity without destructive building teardown.
When to Use a Roof Drain Repair Sleeve
A roof drain repair sleeve is an elastomeric (EPDM, TPE, or flexible PVC) collar engineered to seal damaged transitions between drain components and roof membranes. Use a repair sleeve when the underlying metal drain bowl is structurally sound, but the surrounding membrane has split, shrunk, or cracked due to UV exposure and movement.
Repair sleeves should overlap the surrounding membrane by at least 2 to 3 inches on all sides. After securing the sleeve body, bond the collar to the roofing field using compatible adhesives and seal the upper transition rim with polyurethane lap sealant to prevent water intrusion.
Integrating sound drainage collars with clean exterior gutters ensures smooth water evacuation across all sections of your building exterior.
How to Prevent Future Roof Drain Repair Emergencies
Preventive roof maintenance is roughly ten times cheaper than emergency structural leak repairs. Establishing a scheduled bi-annual inspection plan protects your roof against water infiltration:
- Clear Debris Seasonally: Remove leaves, organic silt, and twigs from the strainer dome and perimeter gravel stop every spring and autumn.
- Inspect Clamping Torque: Check clamping collar bolts annually to prevent loosening caused by thermal cycling.
- Touch Up Protective Coatings: Apply corrosion-inhibiting coatings to exposed cast iron drain bodies at the first sign of surface oxidation.
- Audit Scupper Outlets: Inspect parapet wall openings for blockages, ensuring overflow scuppers remain clear to relieve primary drainage lines during flash floods.
If an intense storm displaces drain hardware or causes severe ponding, scheduling prompt storm damage roof repair restores drainage balance before structural materials degrade. When damage extends beyond the drainage basin across an aging structure, evaluating roof replacement services ensures the entire roof assembly remains secure and code-compliant.
Frequently Asked Questions About Roof Drainage Systems
Can a flat roof drain leak be fixed without replacing the entire roof?
Yes. If the underlying structural roof decking is sound and water has not extensively saturated the insulation layers, a localized repair can fix the leak permanently. Removing the clamping ring, installing a membrane patch that extends at least six inches past the damaged zone, resealing the metal flange, and re-torquing the assembly stops water infiltration without broad re-roofing costs.
Who should I call to fix a roof drain leak: a plumber or a roofer?
Call a qualified flat-roofing professional if the leak originates at the rooftop surface, clamping ring, scupper opening, or membrane-flange seal. If the leak is caused by a cracked cast iron stack, separated PVC slip joint, or clogged interior pipe located beneath the structural roof deck, hire a licensed plumber. Performing a targeted water test isolates which trade is required.
What is the typical cost range for professional roof drain repair?
Professional roof drain repair generally ranges from $300 to $1,500 per drain assembly. Minor repairs involving cleanout, new lap sealant, and clamping ring bolt replacement sit at the lower end of the scale ($300–$600). Comprehensive installations involving retrofit copper inserts, extensive membrane welding, or emergency callouts cost between $800 and $1,500. If heavy precipitation threatens building operations, calling for emergency roof repair stabilizes the leak before secondary interior damage spreads.
Conclusion
A damaged roof drain does not have to result in full roof replacement or catastrophic ceiling damage. By systematically clearing the drain basin, priming the single-ply membrane, applying single-ply patches with rounded corners, and tightening the clamping ring in a star pattern, you restore a watertight mechanical seal that withstands ponding water and seasonal thermal movement.
Regular bi-annual cleaning, combined with prompt inspection of rusted hardware and split seams, preserves your roof insulation and prevents unplanned structural loads.
When your low-slope roof requires expert attention in Martinsburg WV, Bunker Hill WV, or Hagerstown MD, trust the dedicated, non-franchise team at Crafted Exterior Services. We deliver manufacturer-approved installations backed by zero-down financing and full insurance coverage.
Contact our team today for professional roof repair services to schedule a comprehensive roof drainage assessment.